Submit your review | |
Supply and Demand Zones are critical concepts that can help traders identify price levels where buying or selling pressure is strong enough to turn the market. The basic premise is that when demand outstrips supply, prices rise, while an oversupply leads to price declines.
Understanding the Indicator
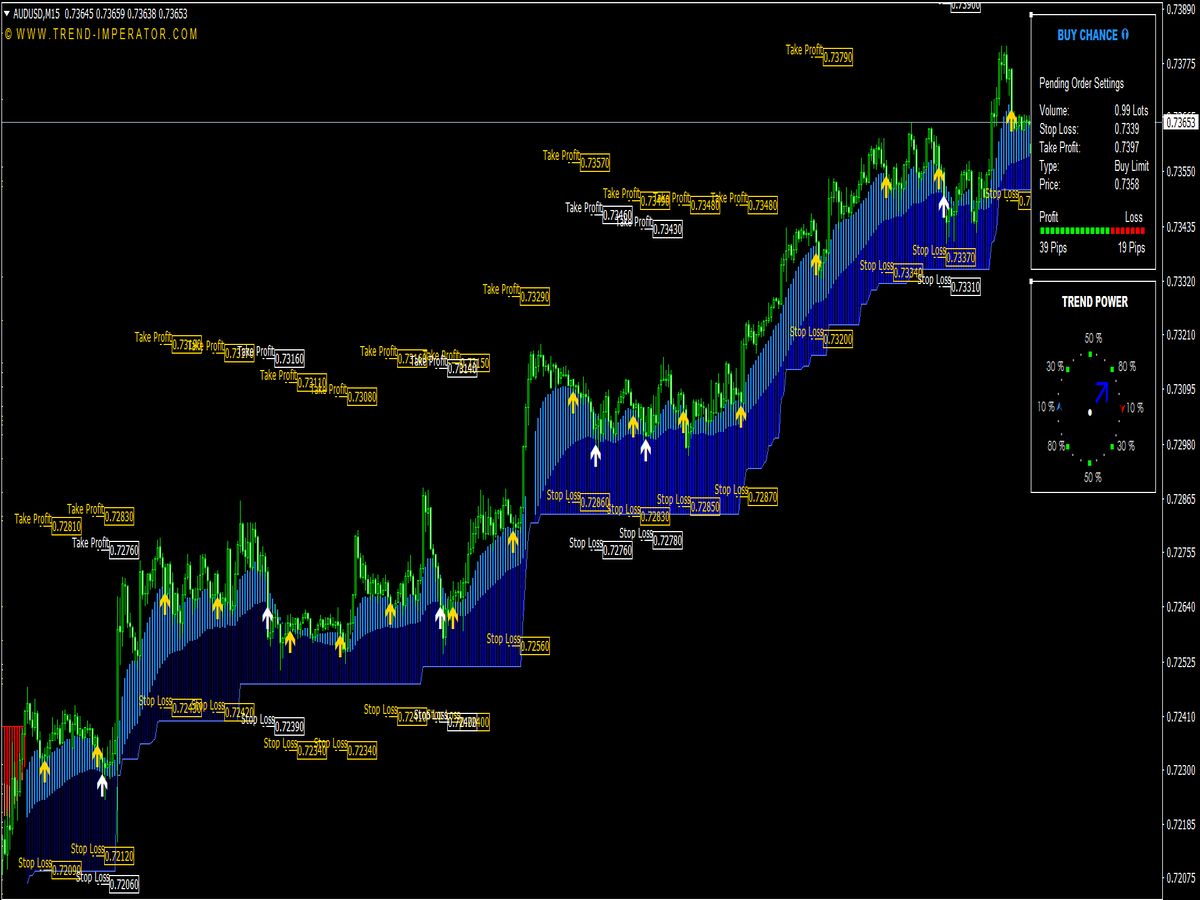
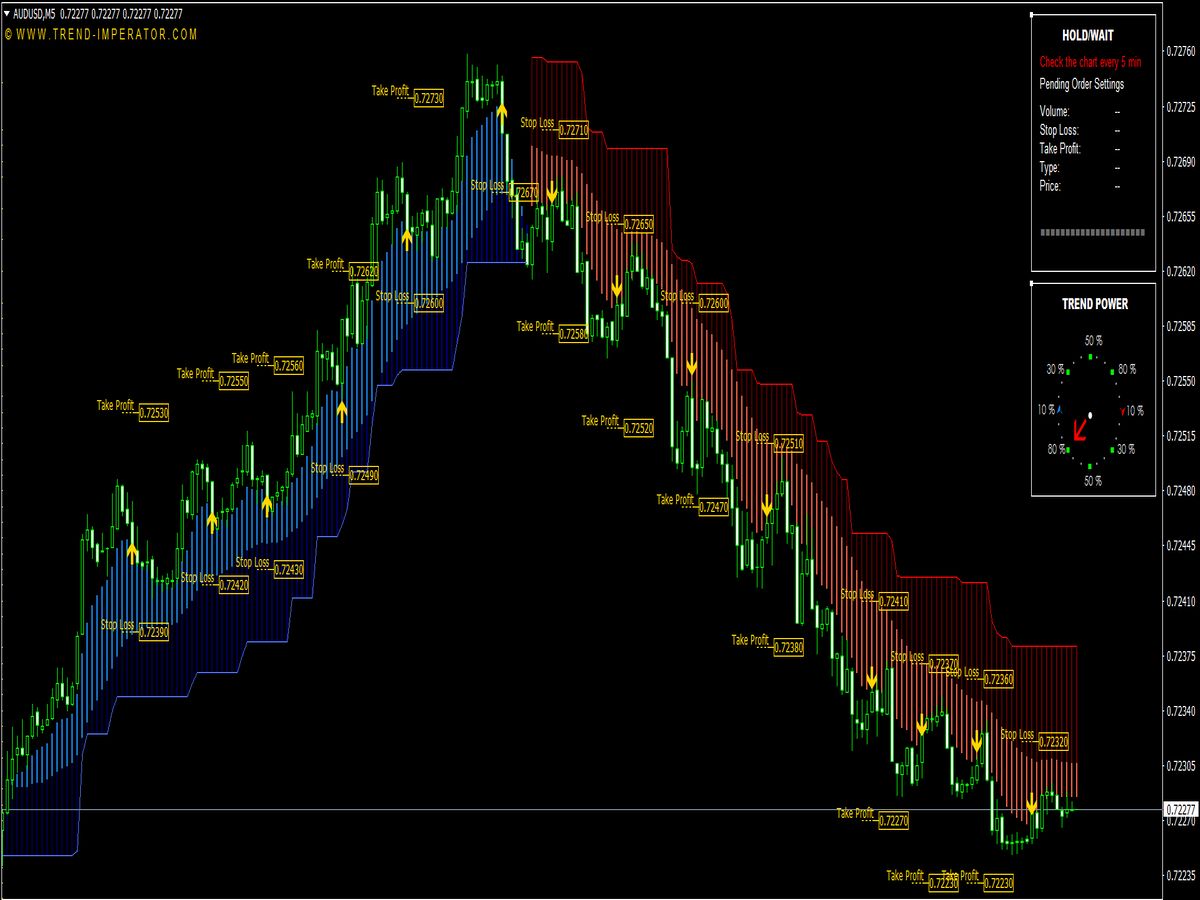
The Supply and Demand Zones MT4 indicator visually marks these critical areas on the chart. The zones represent areas where significant buying (demand) or selling (supply) has occurred in the past, leading to potential support and resistance levels.
Setting Up the Indicator
1. Installation: Download the Supply and Demand Zones indicator and place the `.ex4` or `.mq4` file into the `Indicators` folder of your MT4 installation. Restart the platform to see the indicator in your Navigator panel.
2. Settings: Customize the indicator settings according to your trading style. Adjust parameters like zone color, width, and alerts based on your preferences.
Identifying Supply and Demand Zones
1. Upward and Downward Moves: Demand zones are typically found below the current price in an area preceding a significant upward price movement, while supply zones are located above it before a downward price shift.
2. Confirmation: Look for multiple touches or confirmations of these zones to strengthen their validity. Zones that have been tested often indicate stronger support or resistance.
Trading Strategies Using Supply and Demand Zones
1. Entry Points: Enter long trades when the price approaches a demand zone and shows signs of rejection (e.g., candlestick patterns) and short trades on supply zones.
2. Setting Stops and Targets: Place stop losses just below a demand zone for buy trades and just above a supply zone for sell trades. Set profit targets at previous highs or lows, or use trailing stops for potential extended moves.
3. Timeframes: Supply and Demand Zones are effective across all timeframes. However, higher timeframes (H1, H4, D1) tend to provide stronger signals and are less prone to noise.
Tips for Successful Trading
1. Wait for Confirmation: Always wait for price action confirmation before entering a trade; this may include bullish or bearish engulfing patterns, pin bars, or other reversal signals.
2. Combine with Other Indicators: Use the Supply and Demand indicator in conjunction with other technical indicators (e.g., RSI, moving averages) to enhance decision-making.
3. Keep an Eye on News Events: High-impact news can invalidate supply and demand zones. Always check the economic calendar before trading.
4. Proper Risk Management: Establish a risk-to-reward ratio of at least 1:2. Avoid risking more than 1-2% of your trading capital on any single trade.
Common Mistakes to Avoid
1. Ignoring Market Context: Trading solely based on supply and demand zones without considering overall market trends can lead to poor decisions.
2. Overtrading: It’s important to be selective and patient when waiting for the right setups. Overtrading can deplete accounts quickly.
3. Scaling into Positions: Avoid adding to losing positions; instead, focus on well-defined entry and exit strategies.
Final Thoughts
Supply and Demand Zones are powerful tools for traders looking to navigate the forex market. By identifying these critical levels and effectively managing risk, traders can increase their chances of success. Always keep learning and adapting your strategy based on market conditions.
By mastering the use of the Supply and Demand Zones MT4 indicator and integrating it with sound trading principles, you are better positioned to make informed trading decisions while maintaining a disciplined approach in your trading endeavors.
Really good... Strongly recommend.
📌 More Great Indicators and Trading Systems for MT4 or MT5
- Best-Rated MetaTrader Indicators

- SFI Indicator with Entry and Exit

- Supply Demand Pro Indicator

- CCI NRP MTF Advanced V1 FIX Indicator

- Jurik Smooth Ribbon Zones

- PZ SHS (Head and Shoulders)…
 Pattern Indicator")
- Super Zones Breakout Trading System

- Forex Market Hours Indicator

- Hooded Trader Indicator

- Supply Demand Channel Indicator

- Advanced Supply and Demand Indicator

- Advanced Supply and Demand System

- Ort Supply Demand V3 Indicator

- Advanced Supply Demand Indicator

- Rahasia Zones Scalping System

- Space Buy Sell Zones Trading System

- Session FX Indicator

- Time Zones Black Screen

- Misus Entry Indicator

- Binary Xack Signal Indicator

- Auto Time Frame Supply and Demand

- Non-Repainting and Non-Lagging Indicators